Step by Step on creating a load balance virtual server using a NetScaler.
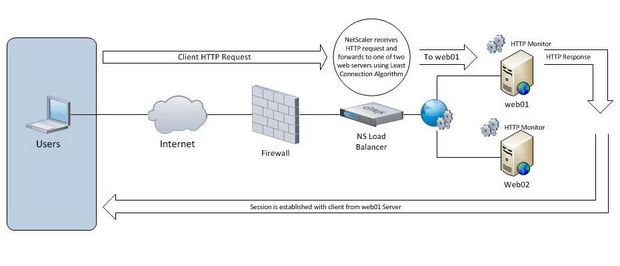
In this scenario we have two identical web servers running 2008 R2 SP1 serving up a static HTML webpage. Both servers have the exact website replicated.
Web01 – 10.38.64.207
Web02 – 10.38.64.209
The Netscaler VIP for the web service is 10.38.64.247
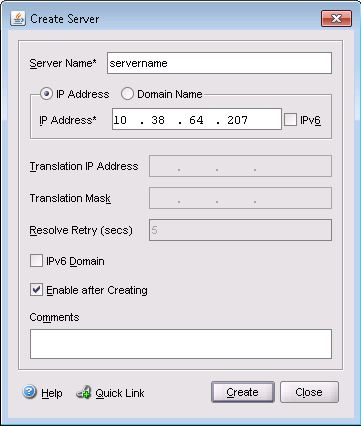
The first step is to create Server Objects that represent the back-end webservers we will be load balancing. Repeat this step for the number of servers you are using.
1. Expand NetScaler > Load Balancing > Servers
2. click Add.
3. Fill in server name and IP and click Create:
4. Next click Service Groups and click Add... Under Specify Members select Server Based and highlight the web servers you just created in step 3. Select port, weight and click Add > button. Weight lets you give a particular server higher preference to serve content and works in conjunction with balancing algorithm you have selected. See Figure 3 below:
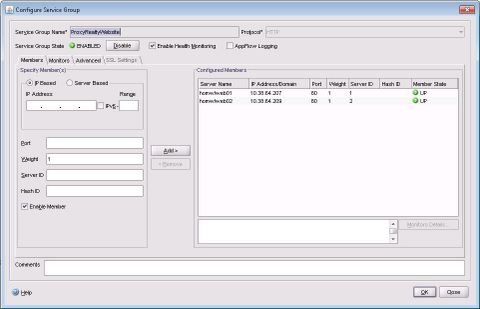
5. Next click the Monitors tab and use the built in http monitor. Click OK.
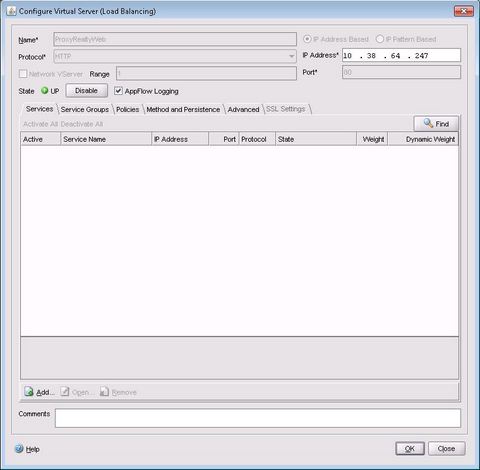
6. Finally select Virtual Servers and click Add... Fill in a Name for the Load Balancing virtual server, protocol, IP address (this is the VIP). Click Service Groups tab and select the previously created Service Group. Click Method and Persistence tab to select LB Method. For this example we will leave default of Least Connection. For Persistence we will use COOKIEINSERT and leave default Time-out value of 2 minutes. Click OK to create. See Figure 4
That is it! We have just created a simple load balance virtual server on the NetScaler that will balance connections based on "Least Connection" algorithm between two identical IIS 7.5 web servers.